First Steps with Trggr
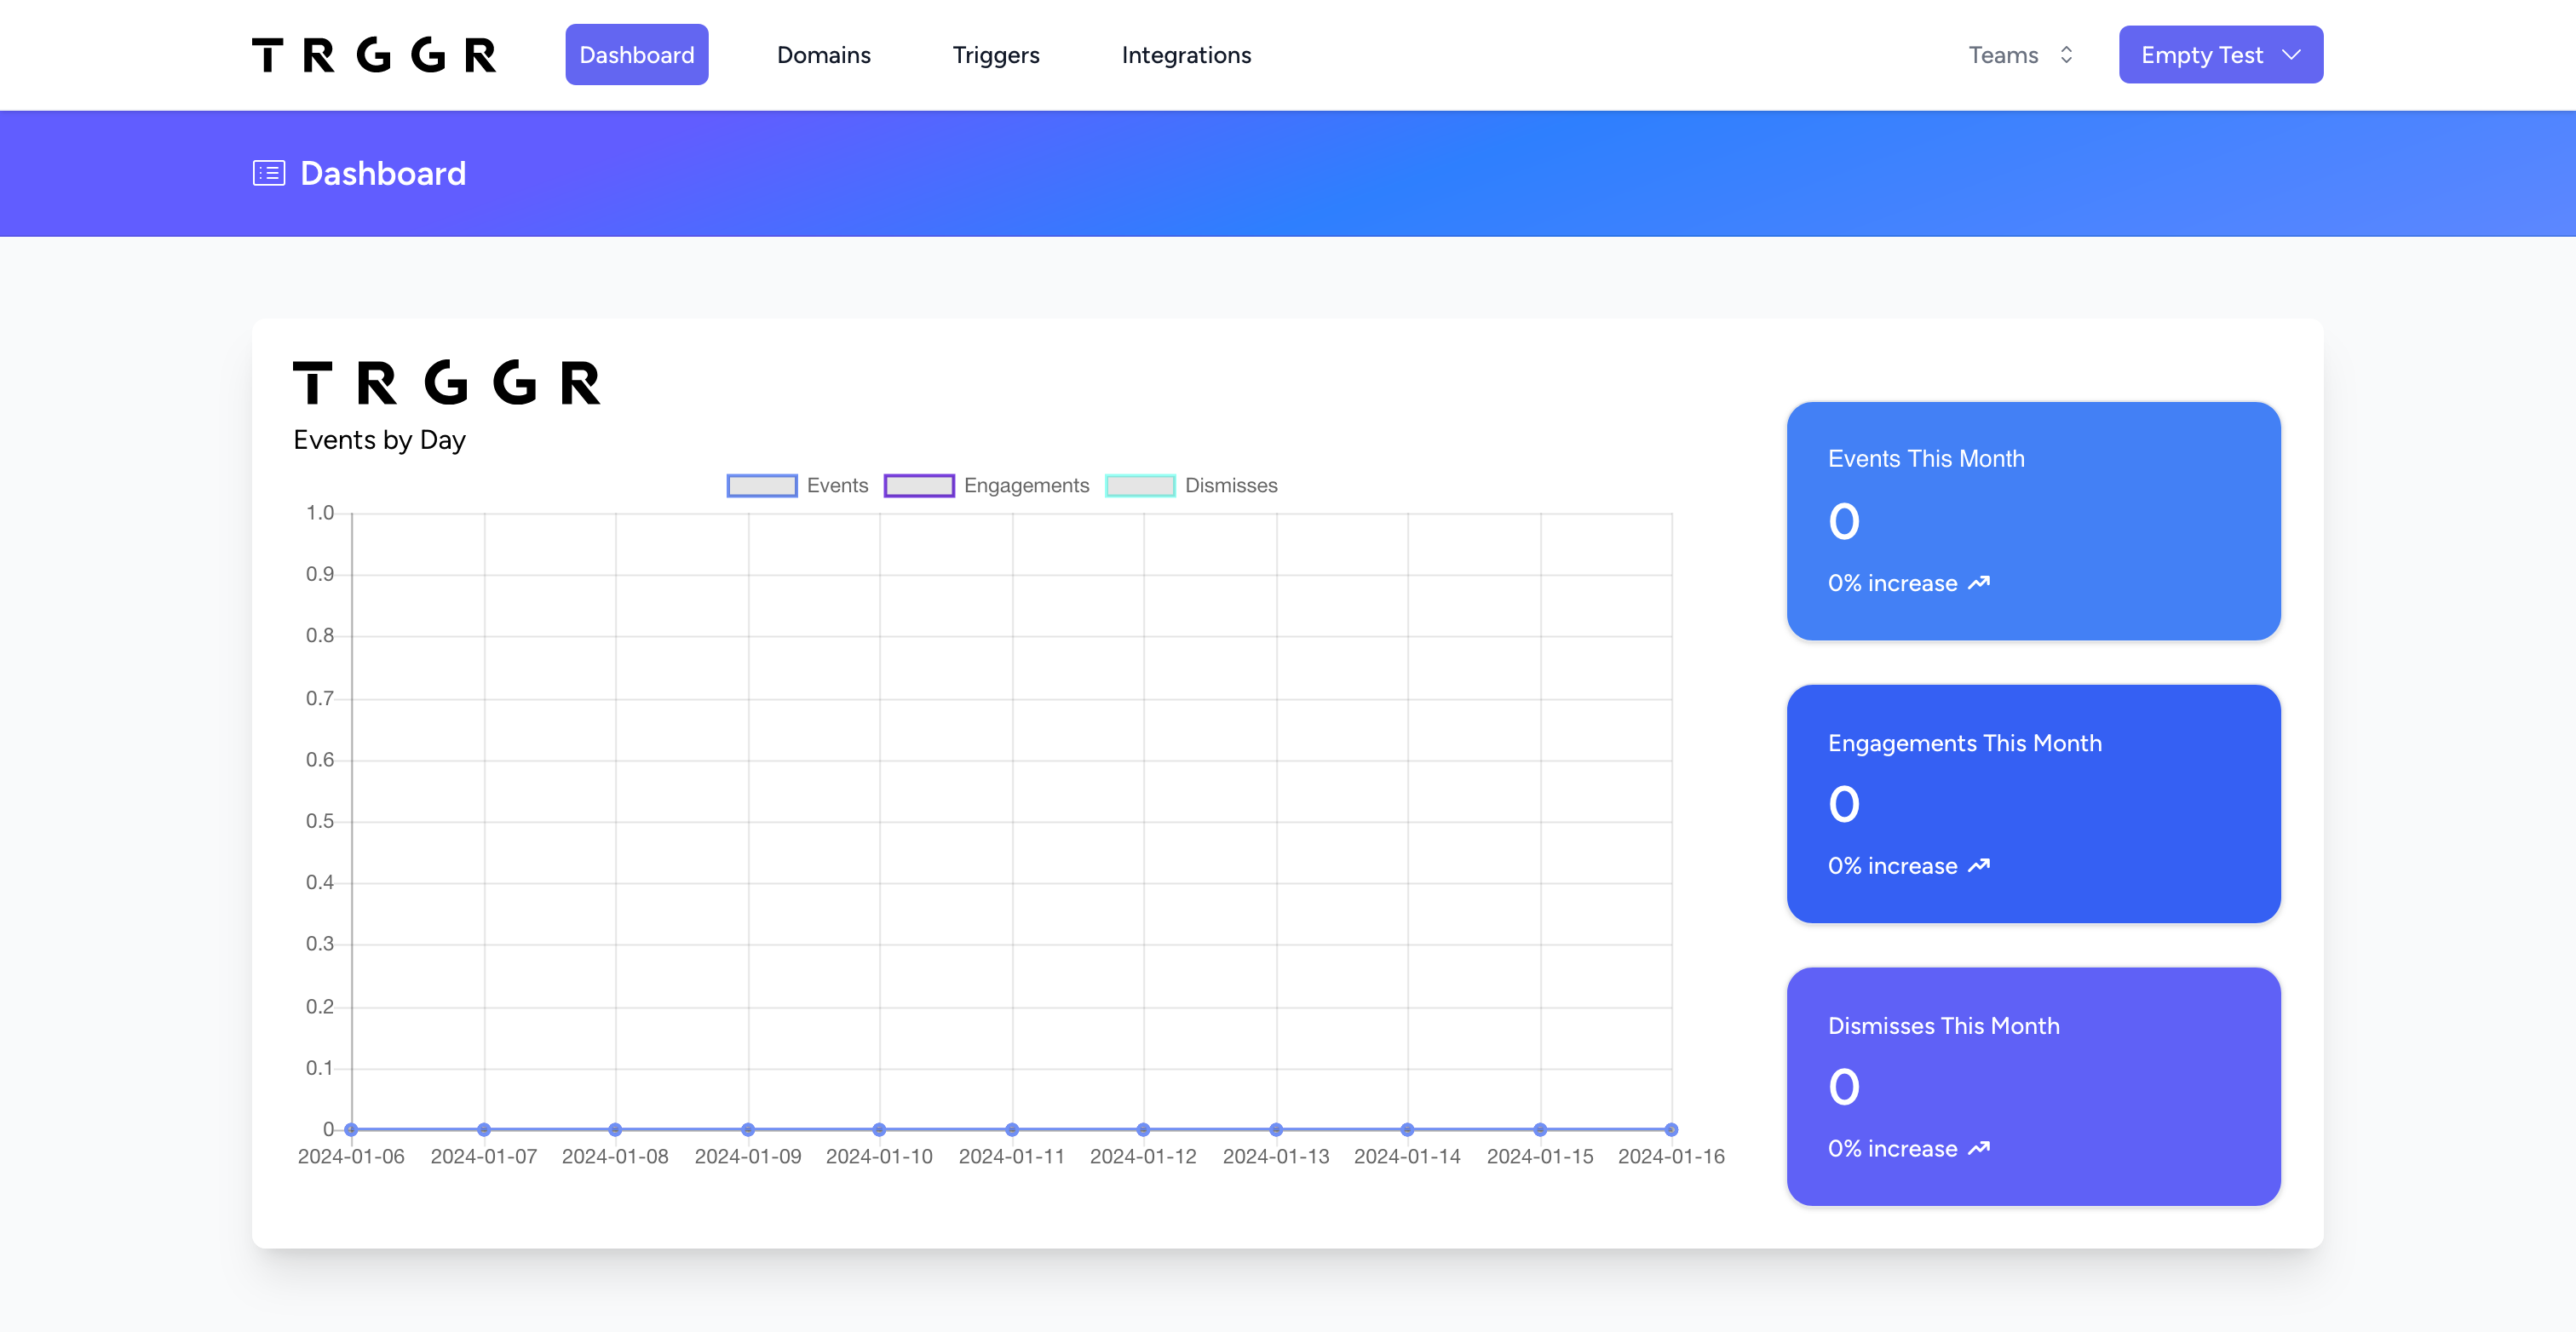
Let’s talk about how you can quickly get started with Trggr. Once you’ve successfully registered, you should see your Trggr Dashboard. The dashboard will give you an overview of how your Trggrs are performing. However since this is likely your first visit, you won’t benefit much from this screen.
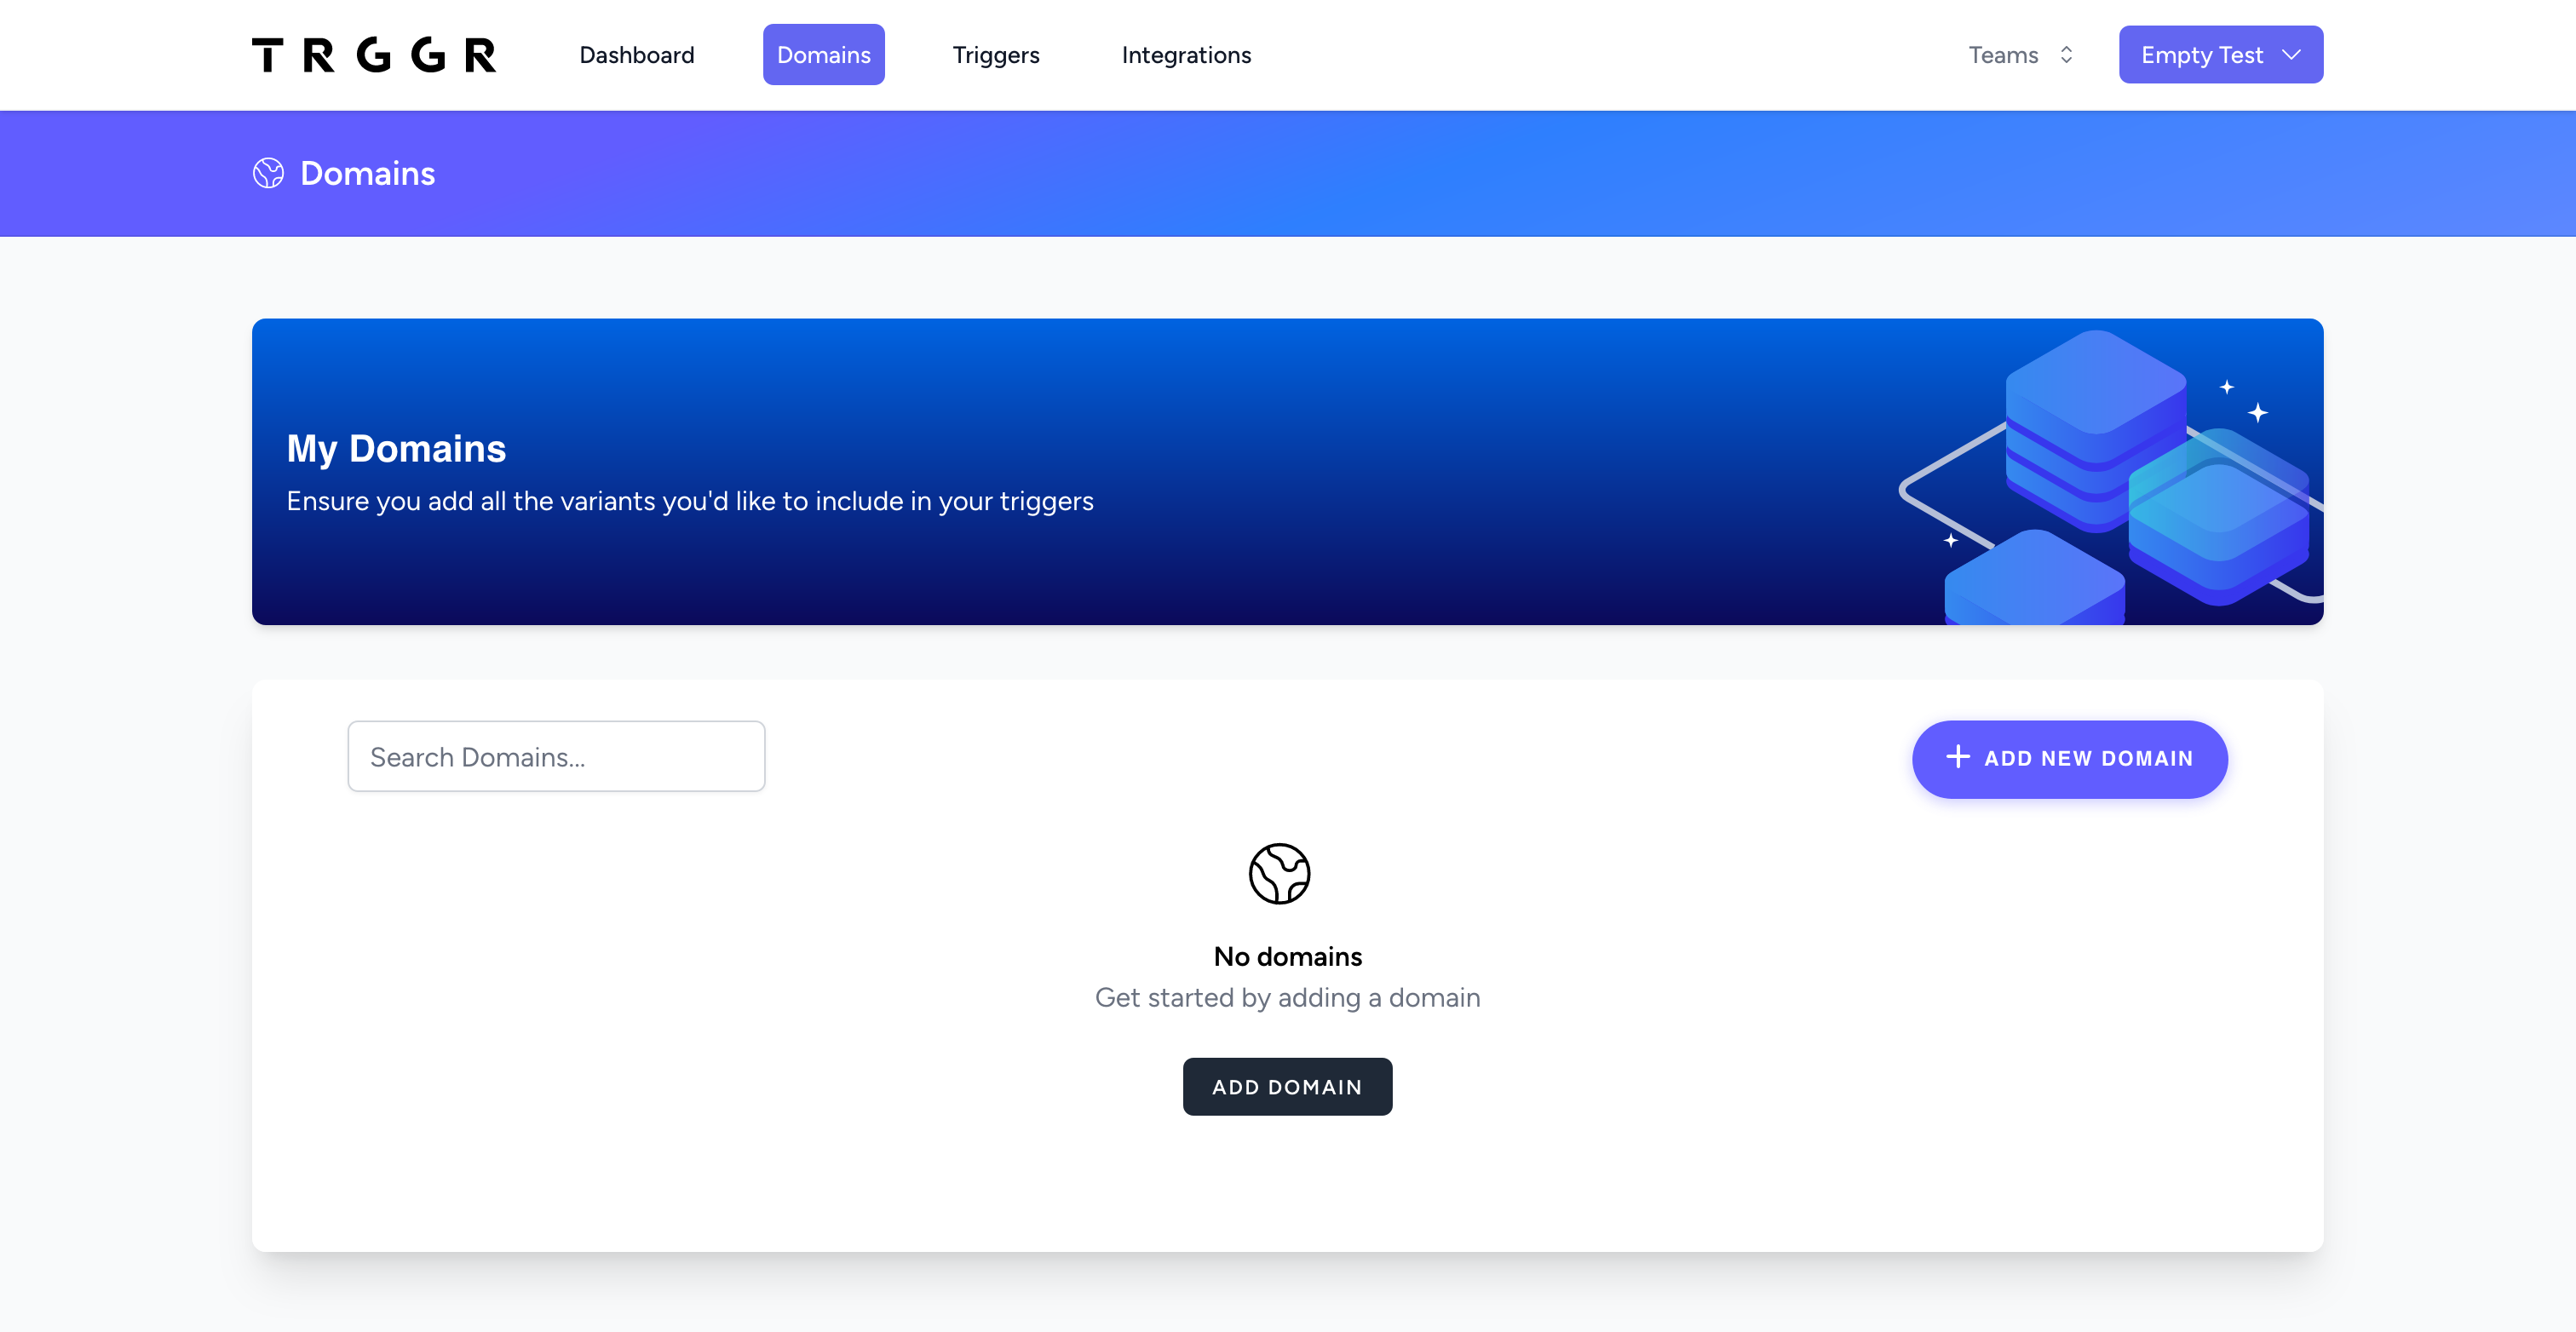
My Domains
The first step you will want to take is establishing your domain. This section is where you will add your domain name. Navigate to the “Domains” Menu item at the top of the screen. Locate the button stating “Add Domain” and press it. Next, please add your domain name on the resulting screen. Include the “https://” (or just “http://” if you do not have a secure certificate). Entering the domain name of the website property you wish to run Trggr on will ensure that your domain is authorized by our software.
Include the Trggr Javascript
This step requires you to include a small reference to the Trggr Javascript file which will allow your web property to run Trggr. Typically javascript references are placed at the base of your html file just before the closing body tag of the the html (“<body>”), or at the top of your document between the head tags (“<head> </head>”).
<script src="https://triggr.storage.googleapis.com/trggr.min.js"></script>Please note that Trggr has no dependencies, so you won’t need jQuery or any other libraries on your website to run the code snippet above.
Create Your Trigger
Let’s create your first trigger. After you’ve completed the steps above (added your domain and you’ve included the Trggr Javascript snippet on your website), navigate to the “Triggers” menu item in the admin panel.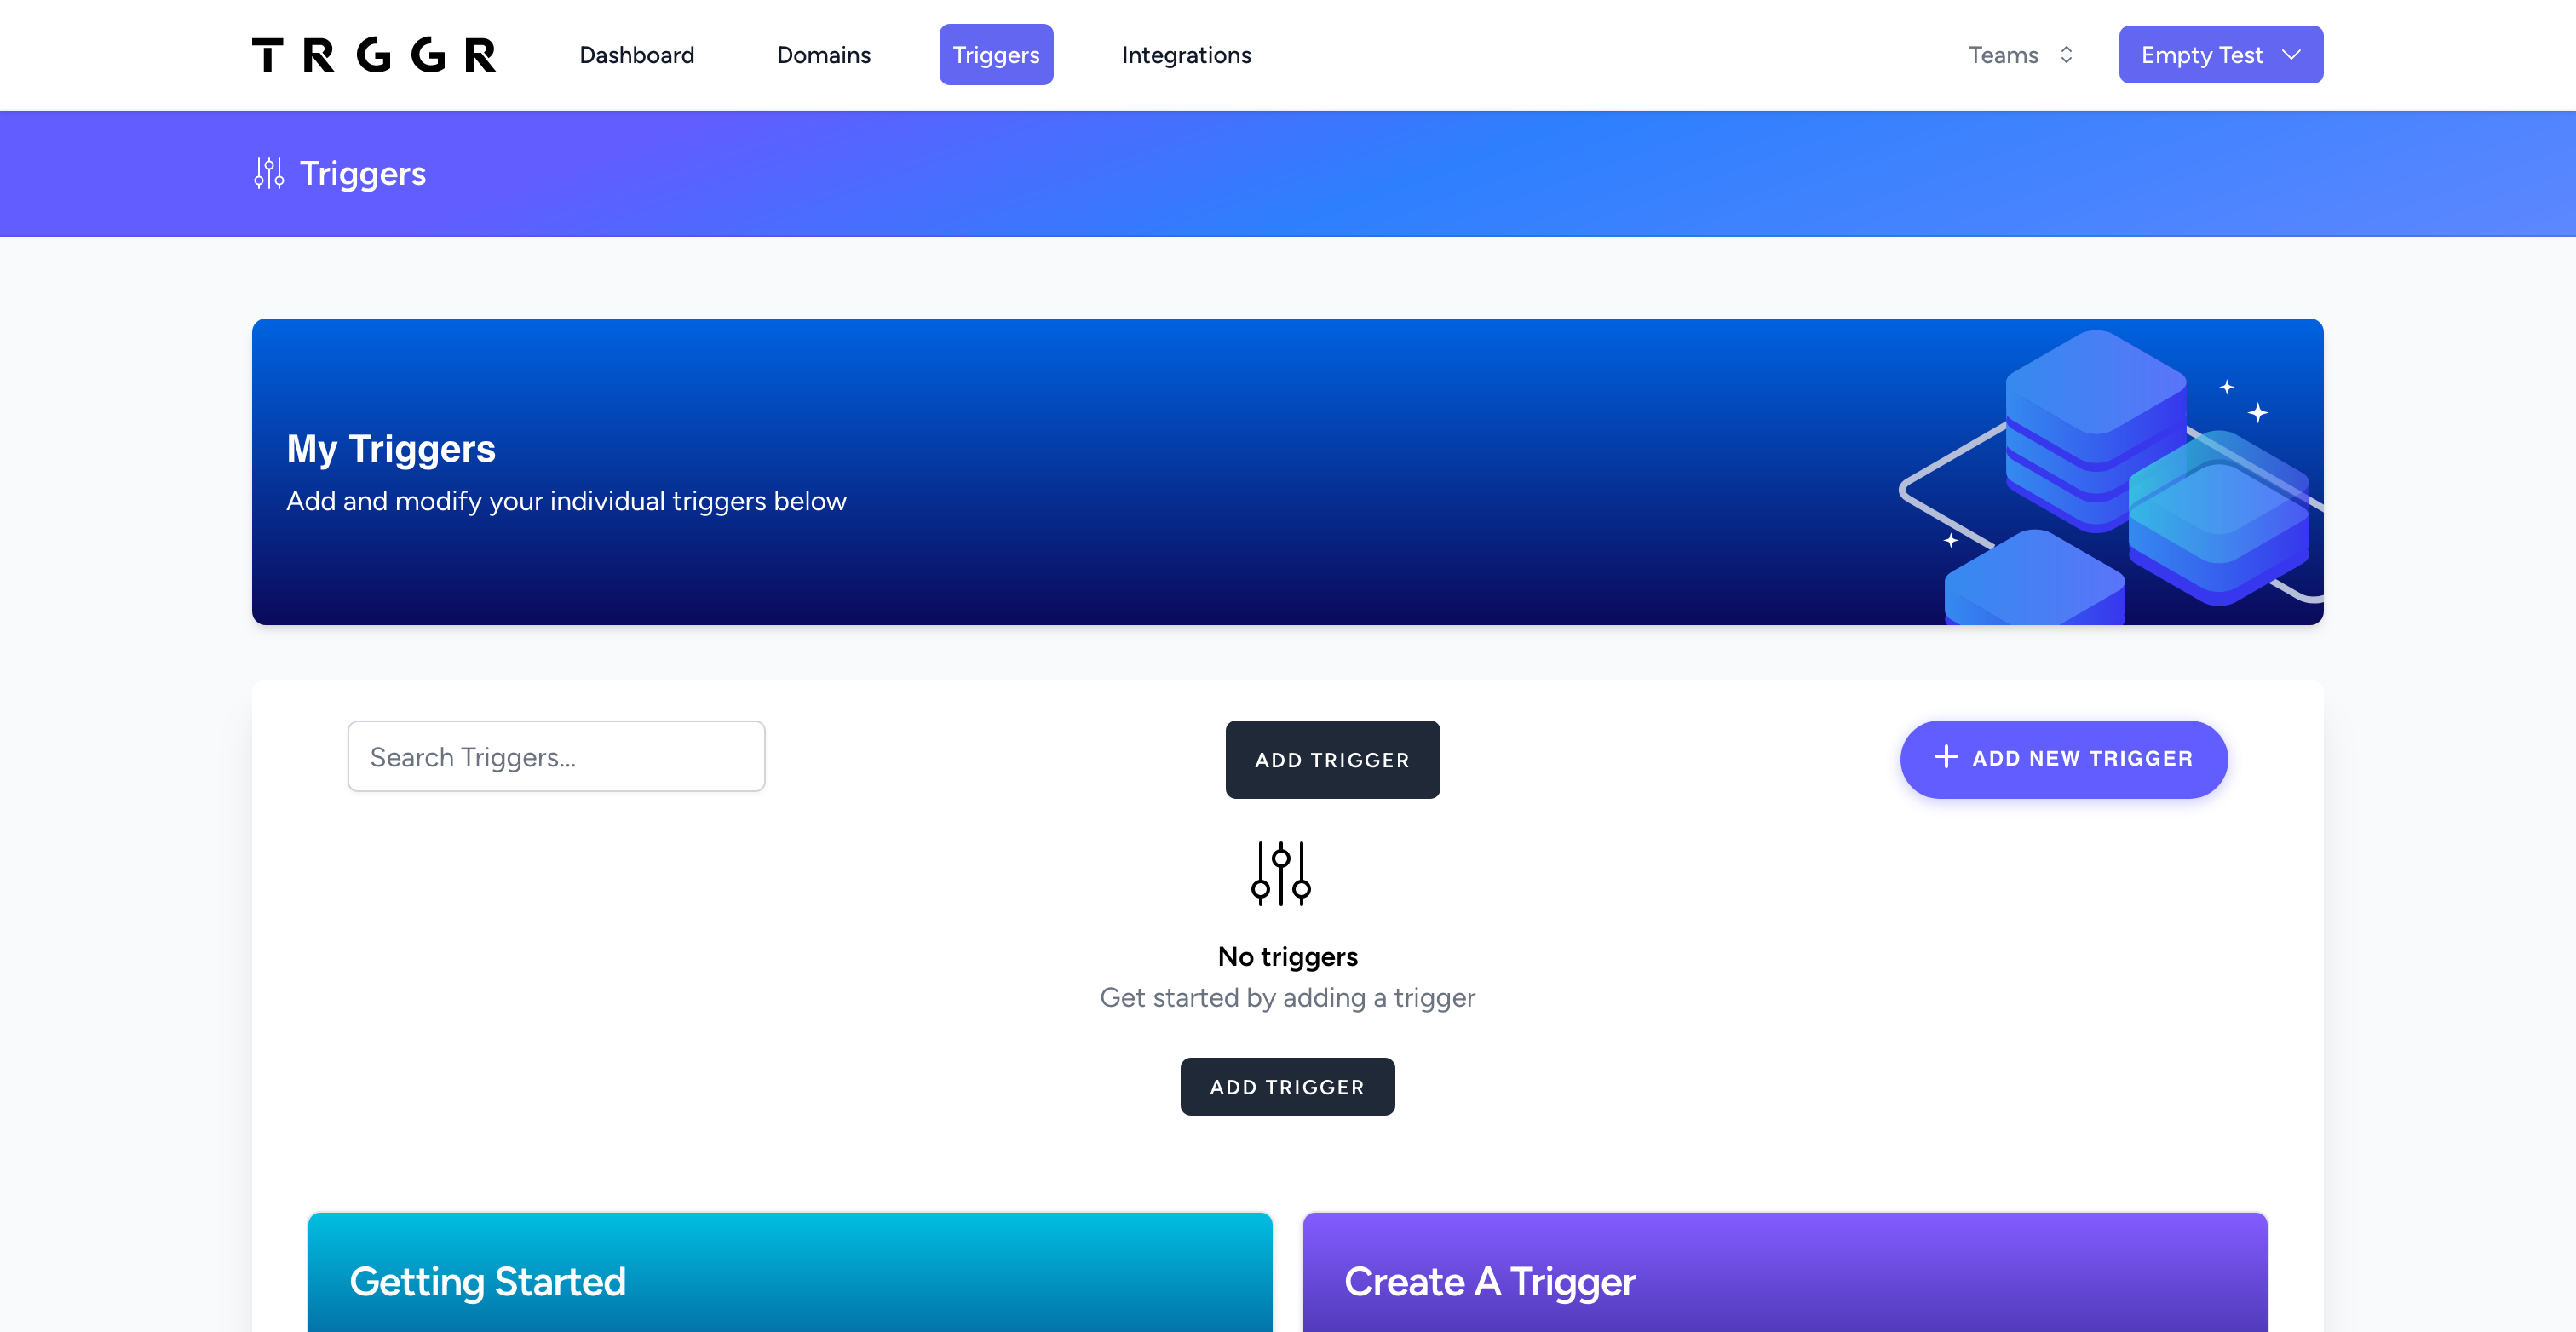
Click the “Add Trigger” button shown above, this will begin the process of creating your very first Trigger.
Name Your Trggr

Step one is adding the name of your trigger. This step helps you identify your trigger, but will have no effect on the content of what your website visitors see. You may also choose to deactivate your trigger (shown to the right of the “Name Your Trggr” label). Note: This toggle switch is helpful after you’ve already completed the trigger creation process if you want to hide the trigger from your website visitors but you don’t want to delete it.
Build Your Trggr
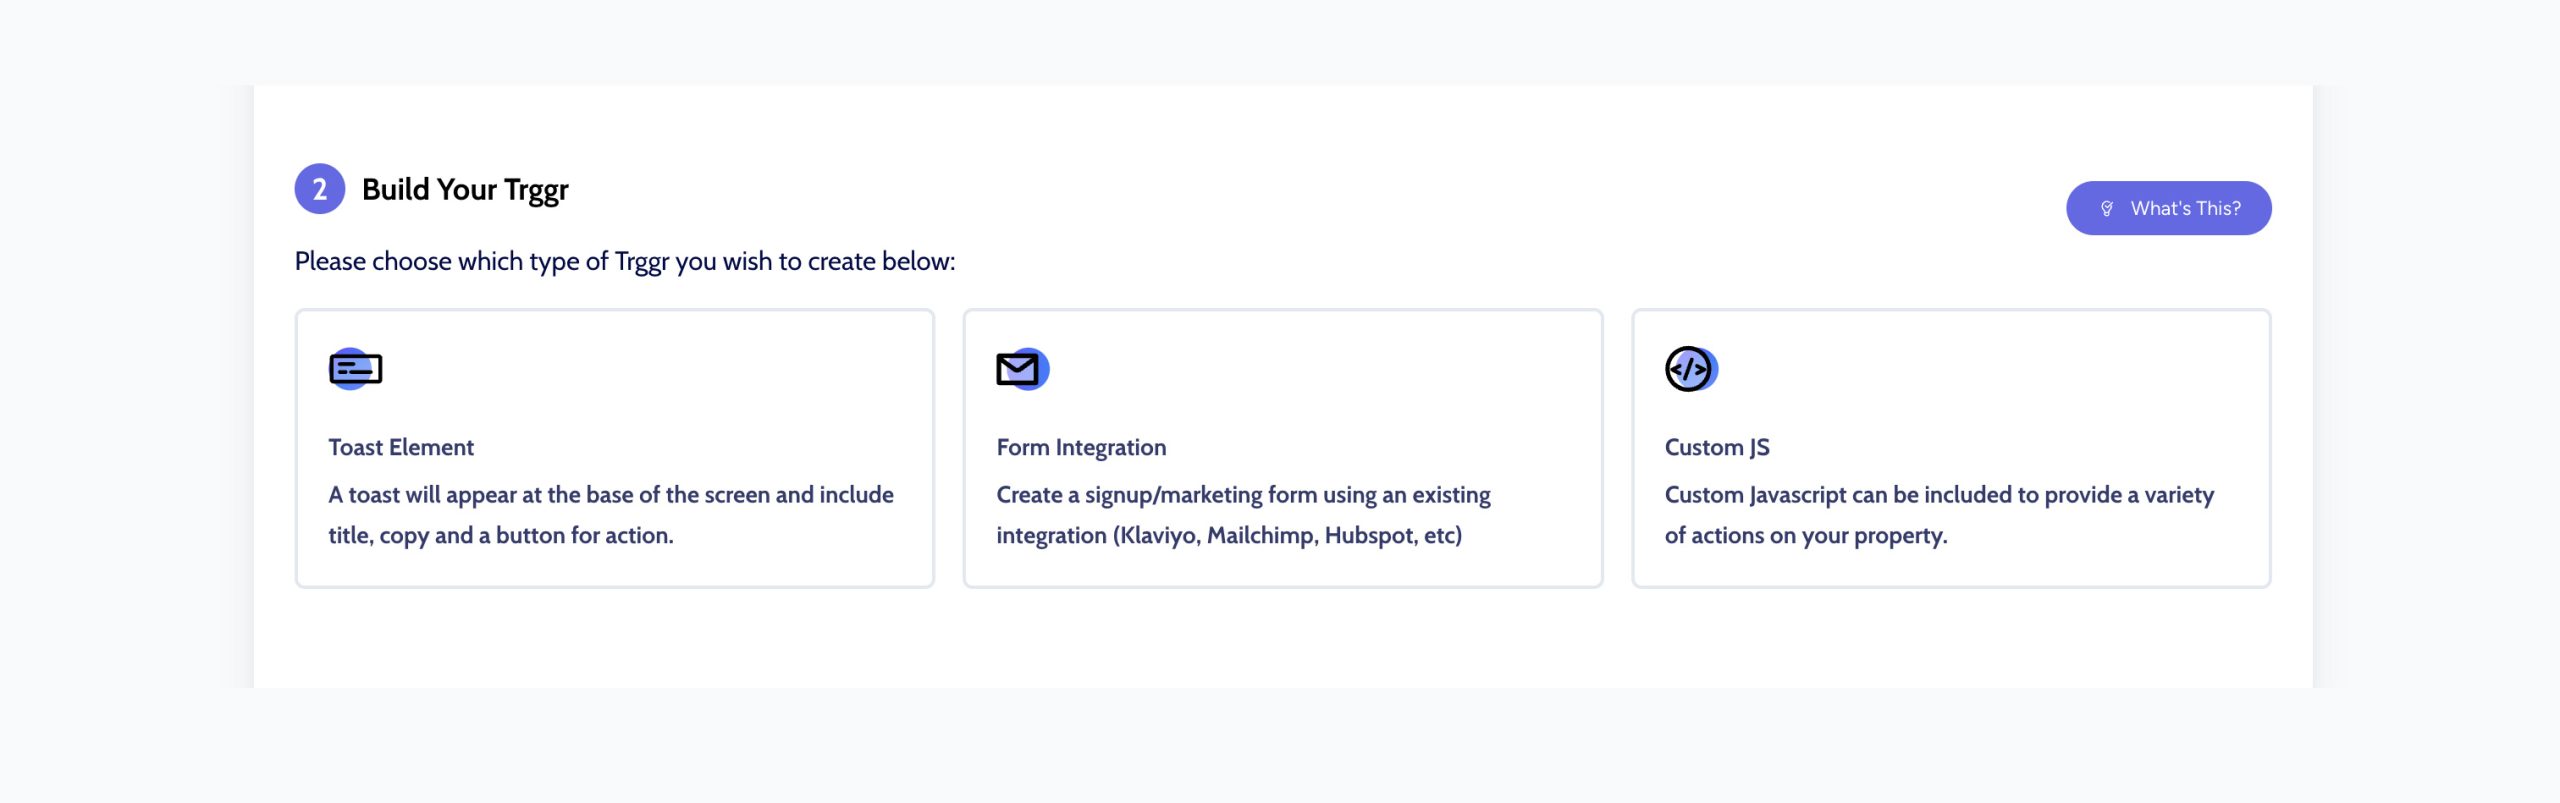
Step two is where you define what type of content your trigger will contain. We offer three main content types:
Toast Element
This format is used for displaying call-to-actions or text-based content. A toast provides feedback about an operation inside of a small popup window.
Form Integration
Trigger offers a number of popular CRM integrations out of the box. These integrations include Klaviyo, Active Campaign, MailChimp, HubSpot, and Constant Contact. A form integration allows you to create simple form signups or subscriptions.
Custom JS
For more advanced users, we offer a custom javascript input. If you are familiar with javascript, you can easily extend Trggr’s capabilities.
To create your first trigger, we recommend starting with the “Toast Element” option. Click that item and proceed to the next step.
Choose Display Position
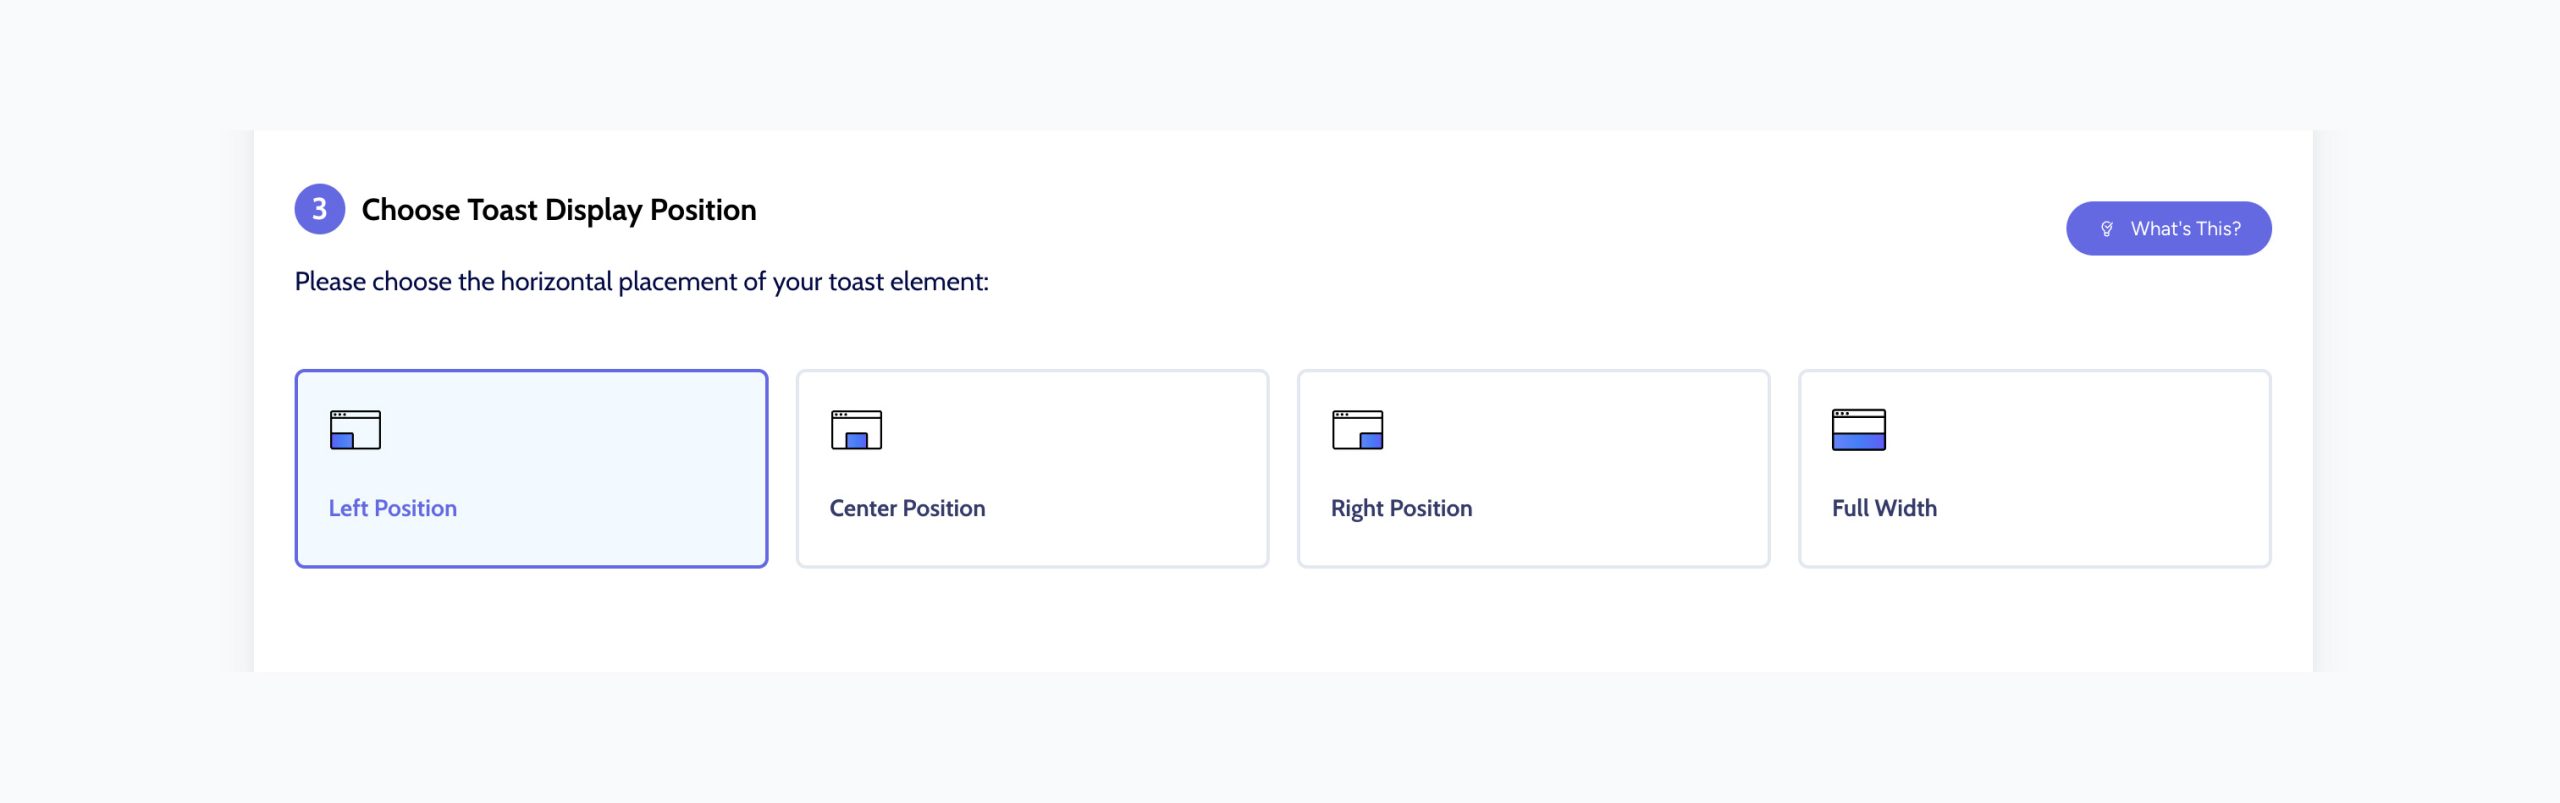
Trigger can position your toast element in 4 layouts. The choices for position are fairly self-explanatory but in short:
Left Position
The toast element will appear in the lower left portion of your website screen.
Center Position
The trigger toast will appear in the lower center of your website display.
Right Position
Your toast alert will display in the lower righthand side of your website.
Full Width
The full width option means the toast element will display full width across the left and right bottom portion of your website.
Enter Your Trigger Details
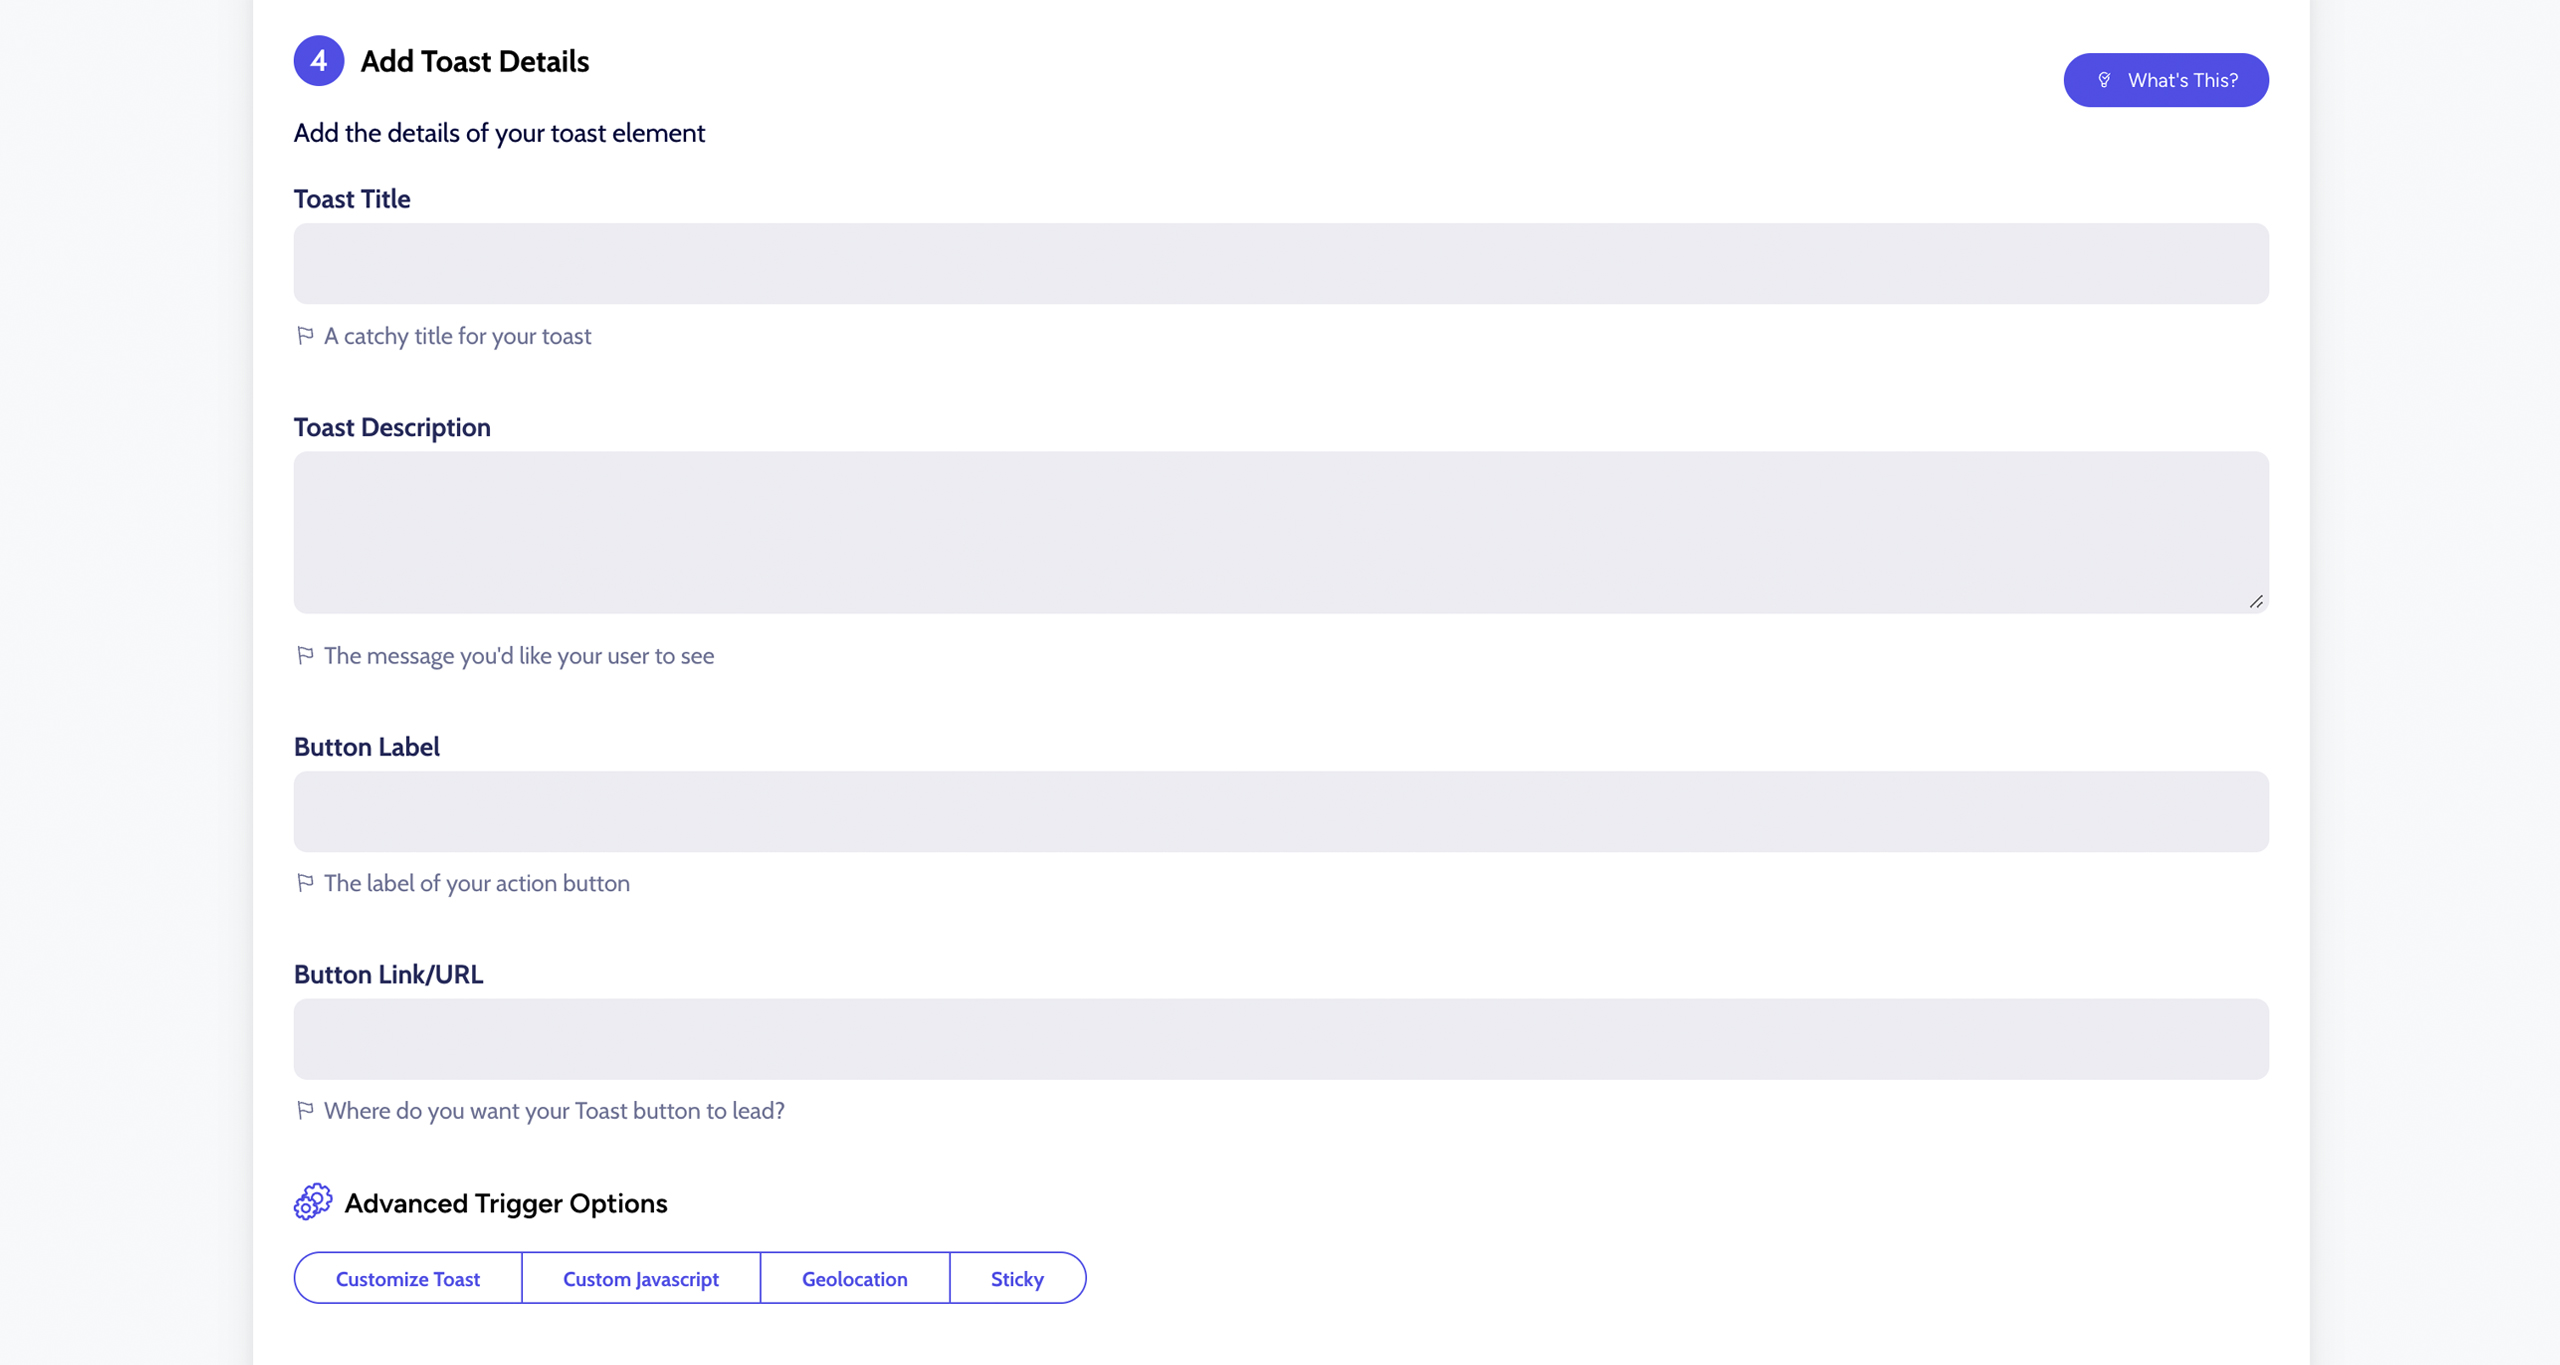
Your Toast Details controls the bulk of the content that your trigger will contain. Here you can add the title of the trigger message, the description/detail of the message, and define the label of the button or call-to-action. See the diagram below to identify what each of the input fields on this step represents:
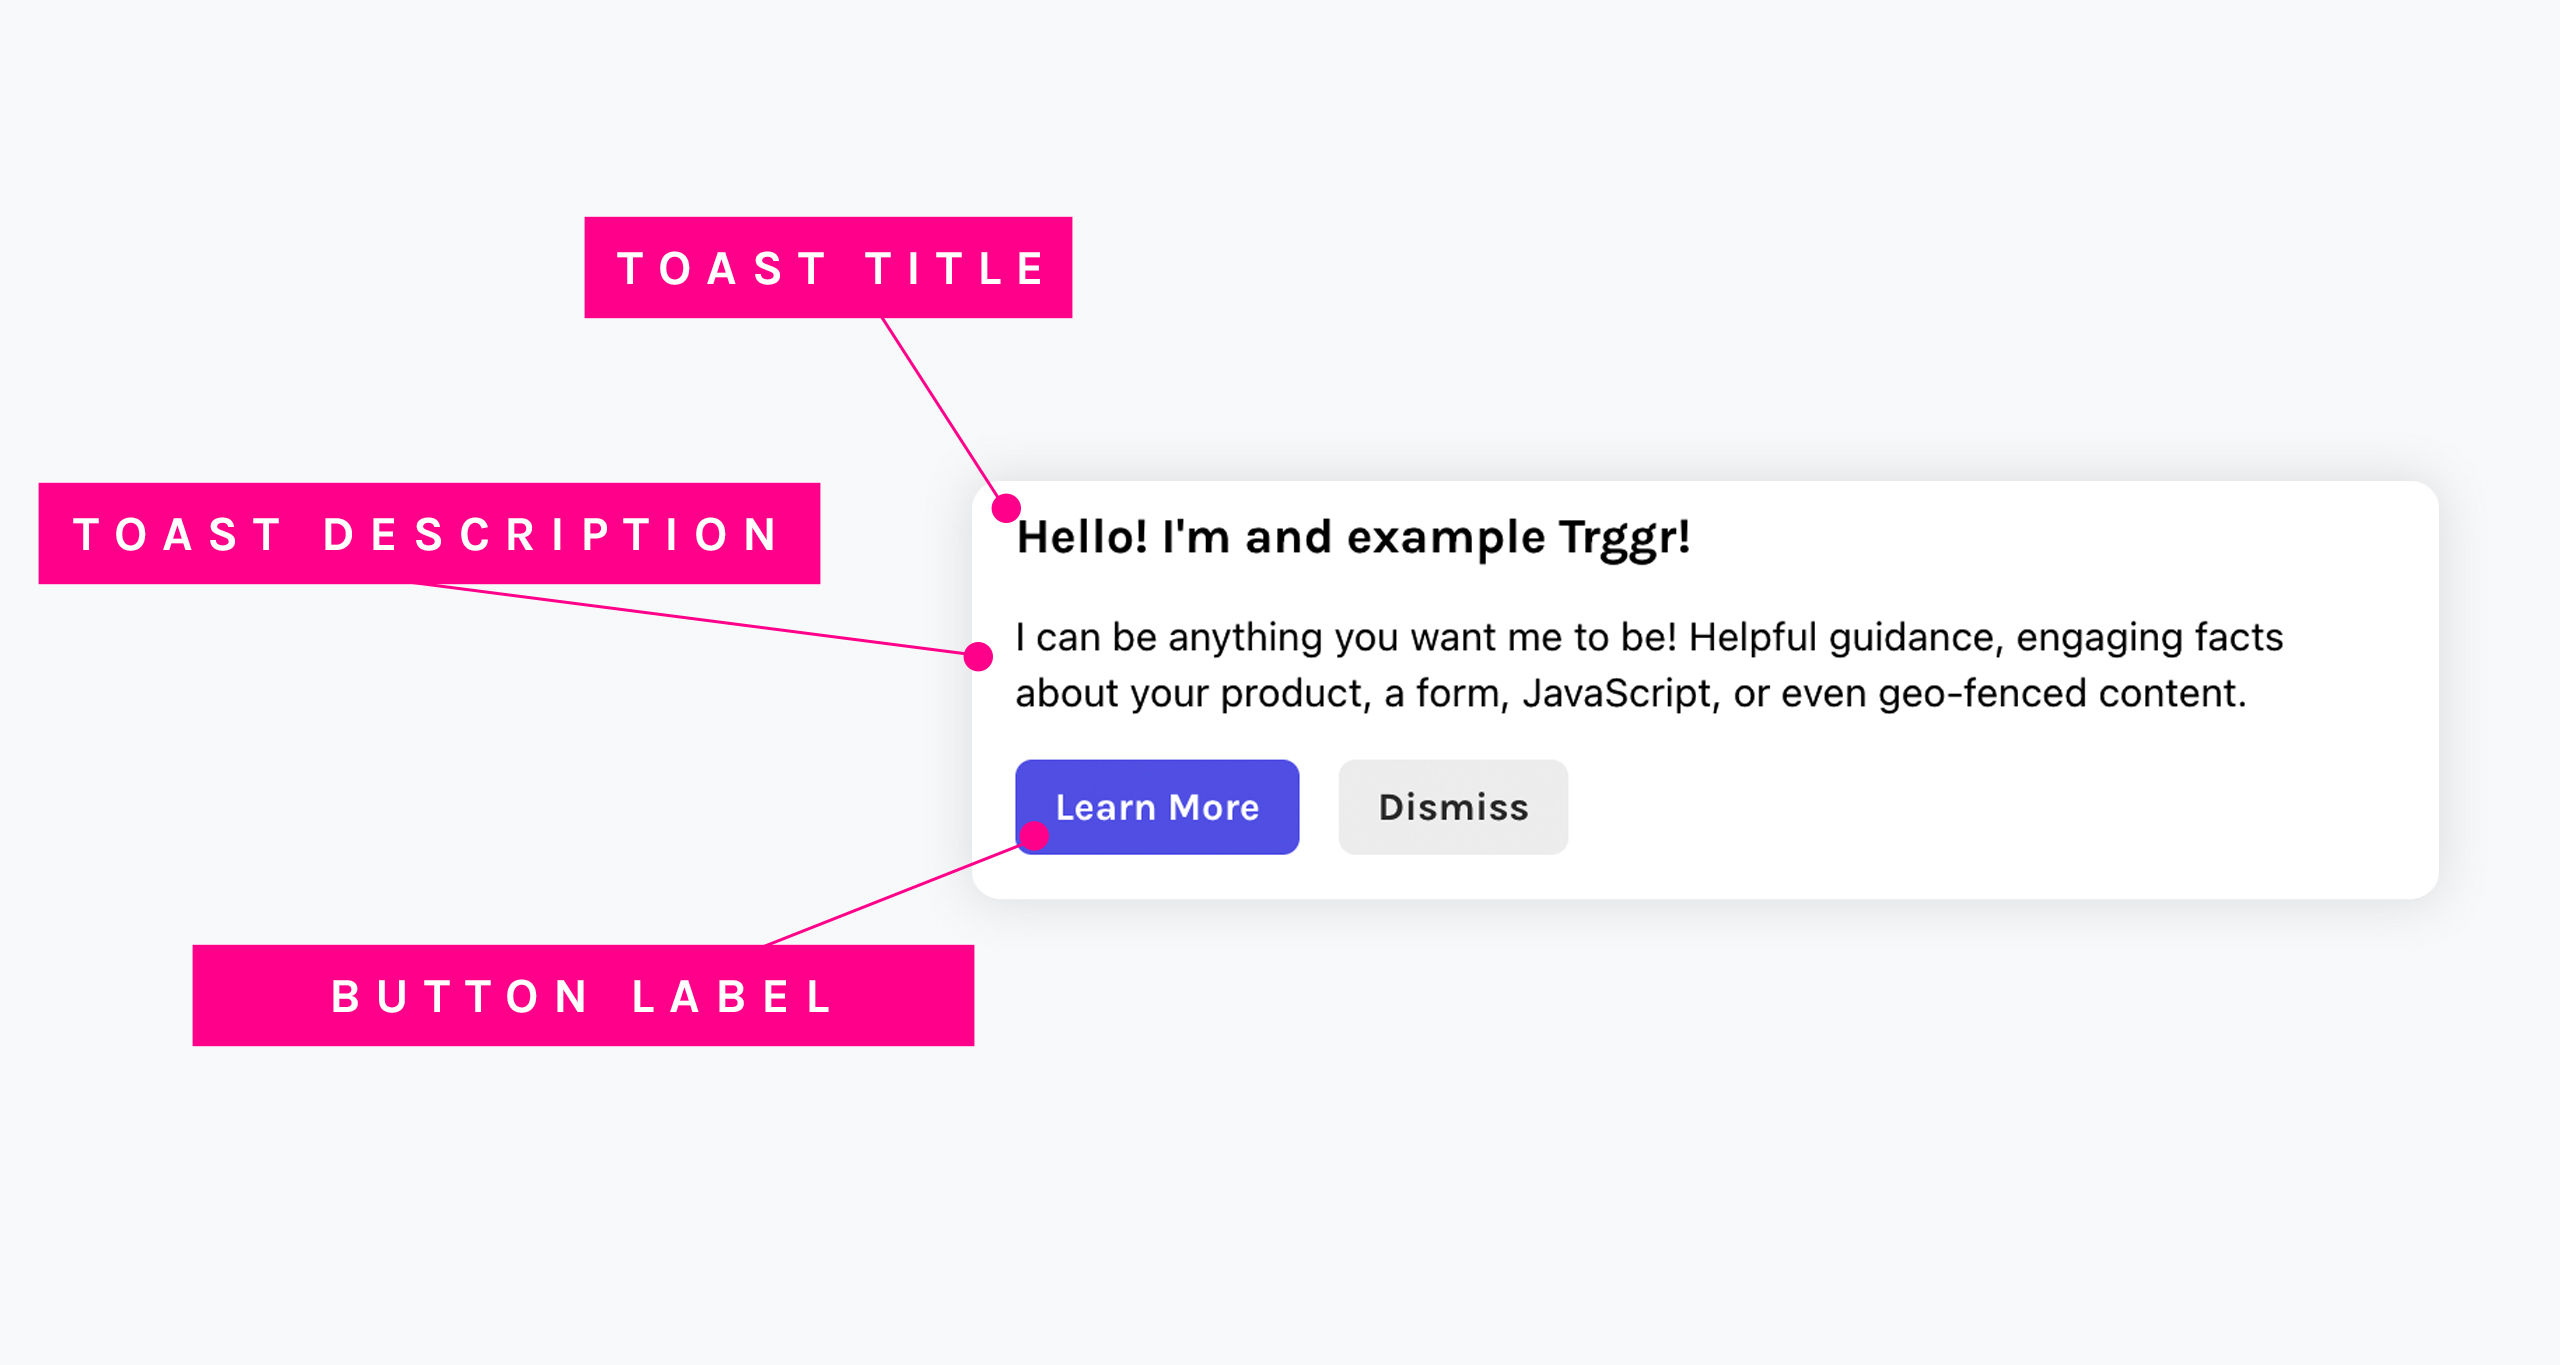
The final field in the form for adding your Toast Details is named “Button Link/URL.” This input is where you place the web address or URL that you want your users to go to after pressing the call to action on your toast. For example, if you want to direct users to your Contact Page with your trigger, you would enter the full URL address of your contact page. Example: https://www.mywebsitename.com/contact-us/
For the purposes of this Getting Started article, we will not cover the “Advanced Trigger Options.” You can ignore that component and proceed to the next step after entering in your Toast Details. For more information on customizing the look of your toast, consider our article Customizing Your Trigger Toast.
How to define your funnel
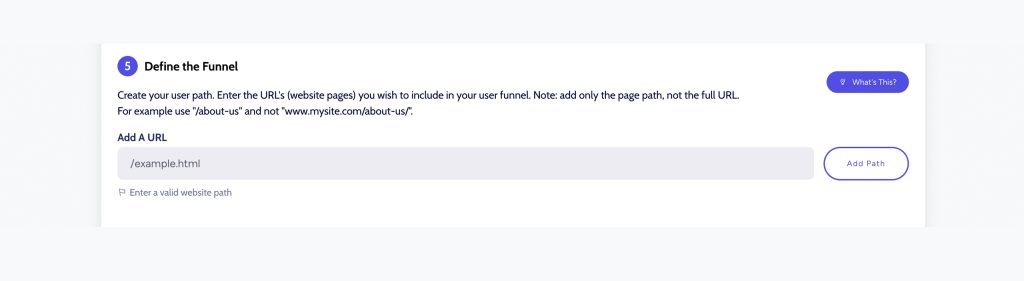
A funnel is a sequences of steps or stages that guide your users through a specific journey. With Trggr, the funnel represents specific “pages” on your website. Your define which pages your visitors will travel before your trigger is activated. Your trigger will occur on the last page of your funnel.
A note on paths: When adding path’s to your funnel, please use relative paths. If you want your trigger to appear on your homepage, you would simply include a backslash in the funnel “/”. This represents the root of your website. If you instead want to fire your trigger after a sequence of pages you define, you would add them individually:
/
/about.html
/shopping.html (here is where your trigger will fire)
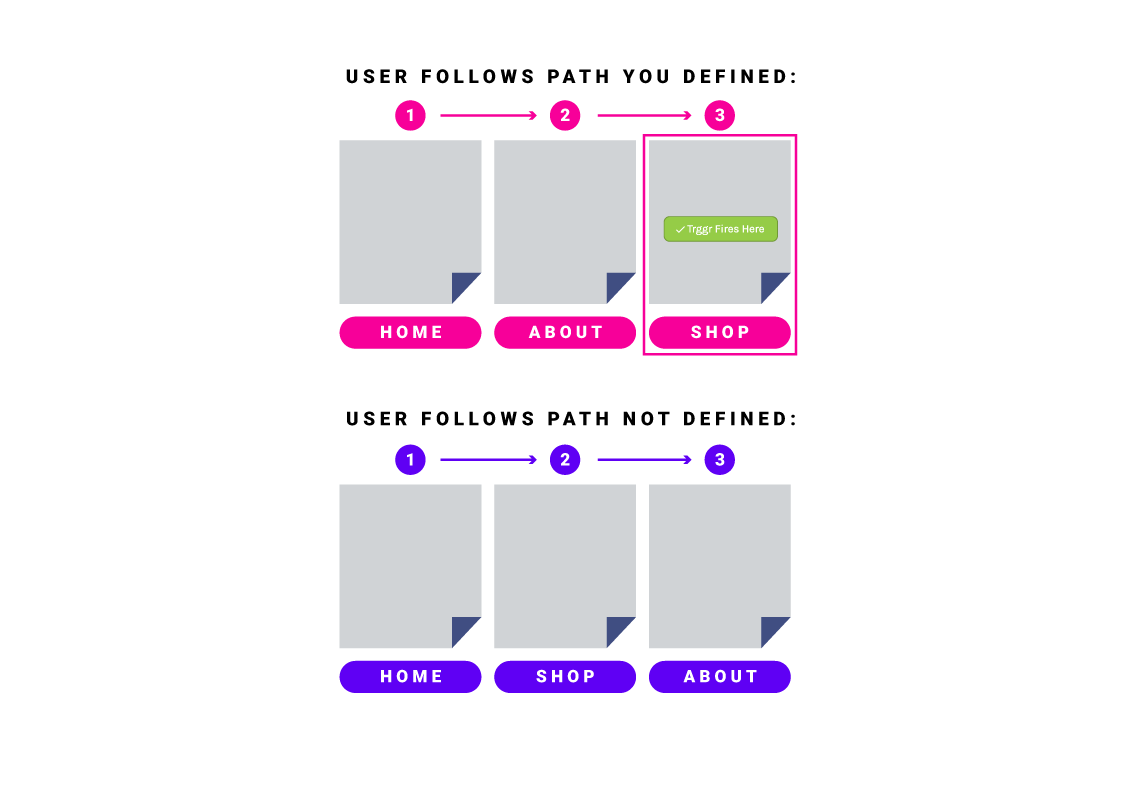
In the example above a user would see your trigger after the visit your homepage, your about page, and finally your shopping page. The last page entered in your funnel is where you trigger fires. If a visitor to your website travels down any other path not defined in your funnel, your trigger will not fire. This lets you create very specific paths to target user behavior. The illustration below indicates how the page sequence dictates the trigger:
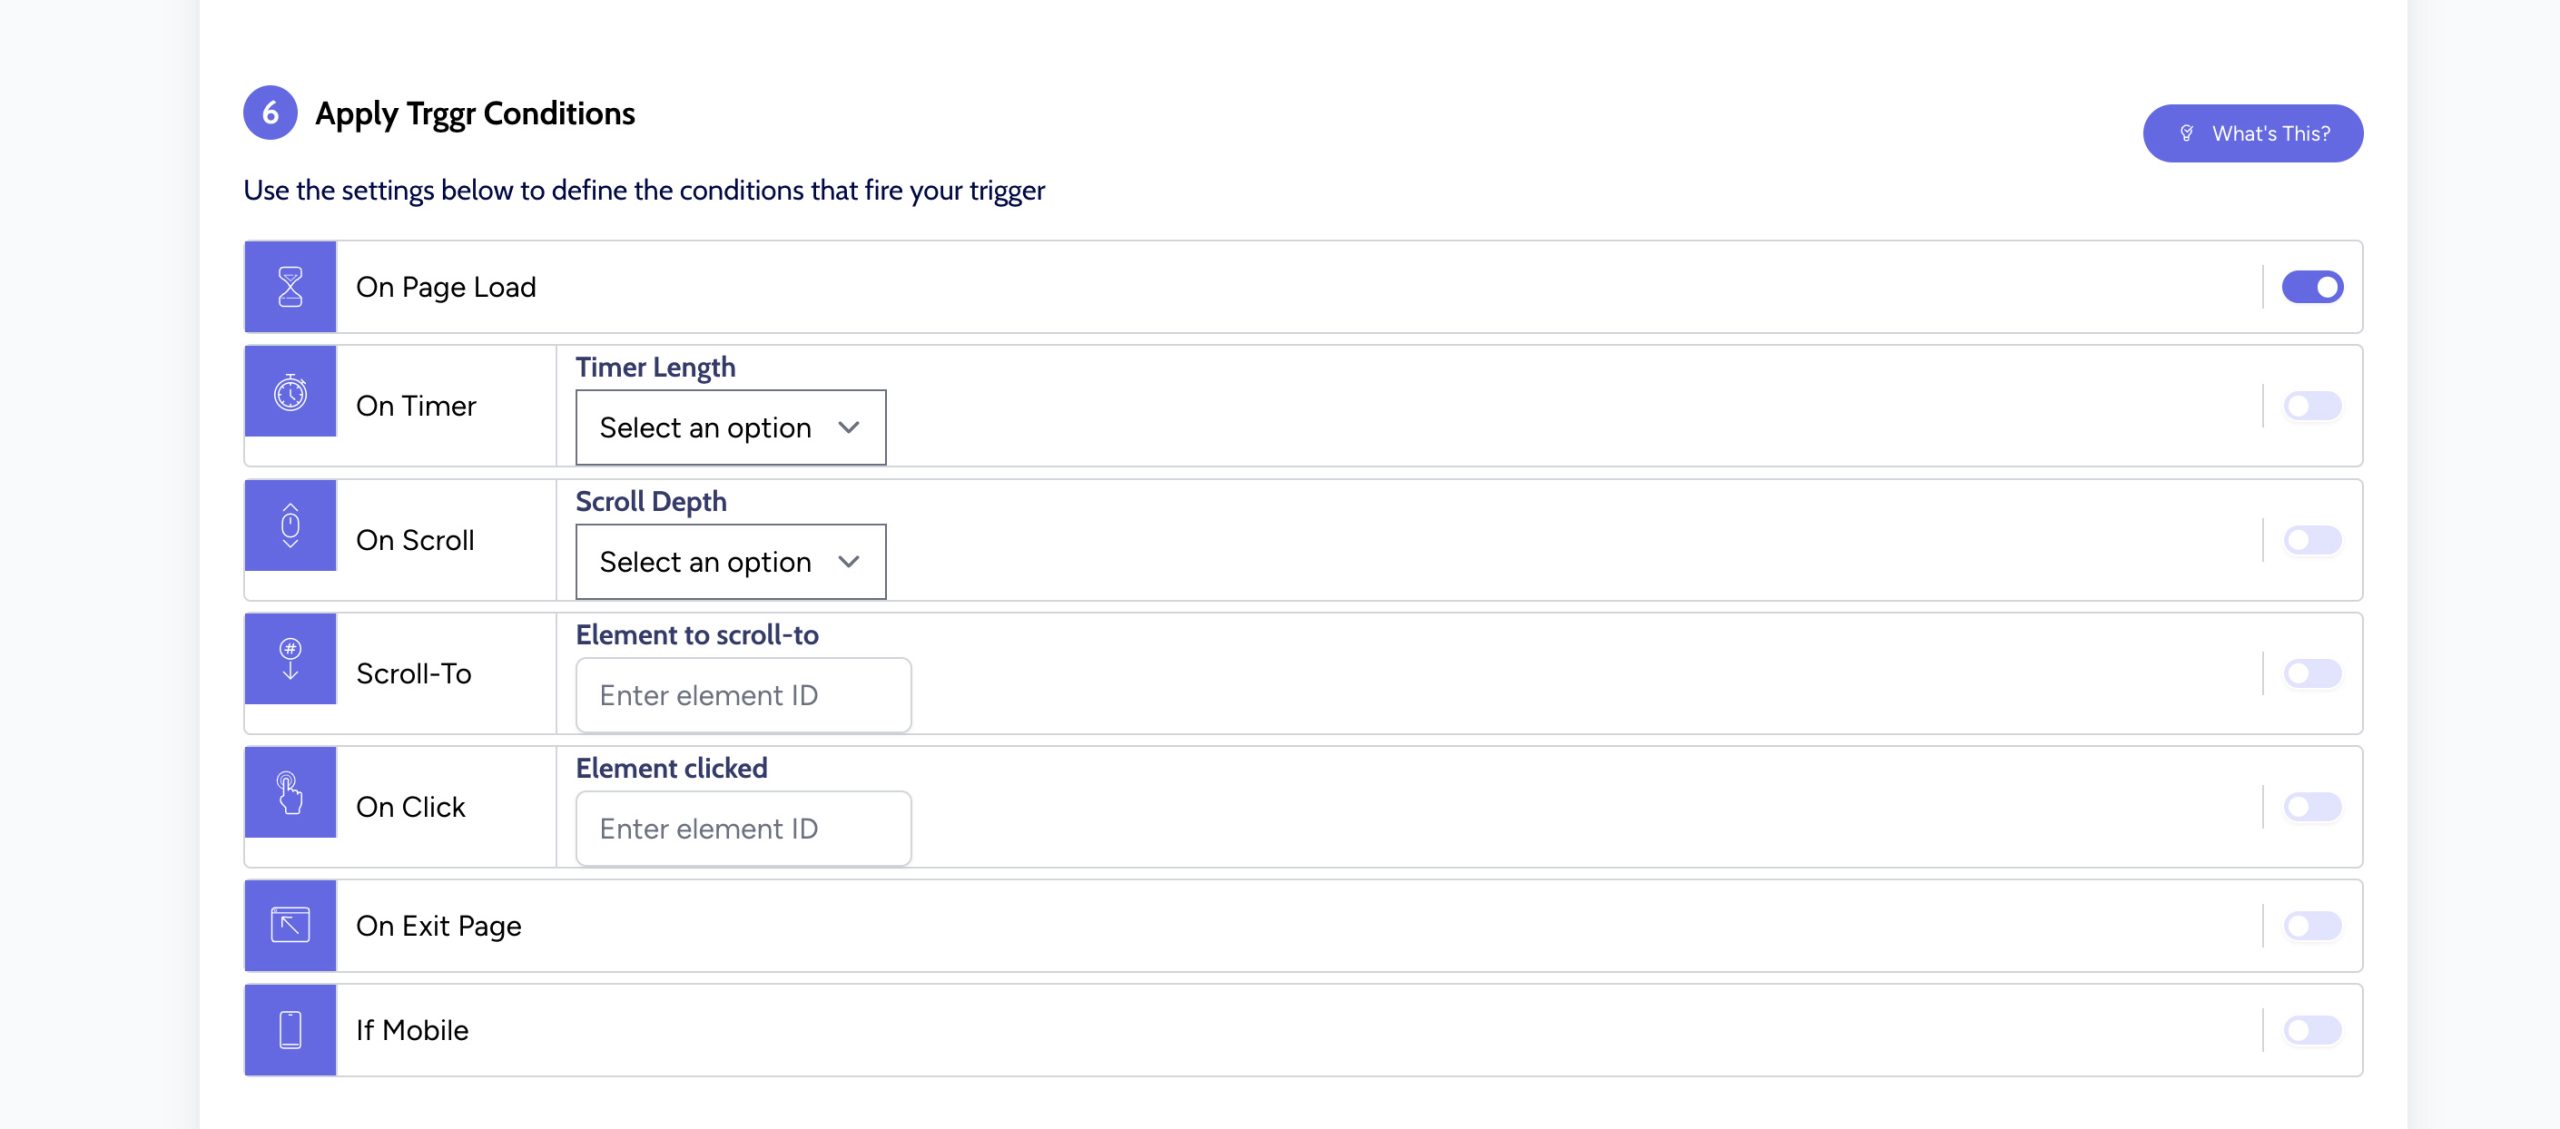
Set You Trigger Conditions
The last step in completing your first trigger is to set the conditions that you want to fire your trigger. We offer a number of common conditions outlined below:
On Load
Fire your trigger as soon as your web page loads. This condition essentially fires your trigger instantly ( once the visitors browser renders your webpage ).
On Timer
Choose this condition if you would like to delay the activation of your trigger anywhere between 2 and 30 seconds of the user visiting your page.
On Scroll
Fire your trigger when a user scrolls down your page by 25%, 50% or 70%. This condition is ideal for longer content pages with lots of content.
Scroll-To
Stroll-To allows developers to include an element ID that Trggr will recognize ( for scroll-actions, jump links etc ). This is an ideal condition for a CTA button that autoscrolls visitors to a specific section of your web page.
On Click
Trggr allows you to define a webpage element by ID to activate your trigger on click. Define a specific button or graphic element on your webpage by ID, and fire your trigger once that element ID is clicked/tapped by your visitor.
On Exit
This condition detects when a user is navigating away from your webpage by interacting with their web browsers tool bar. You can request that Trggr fires an action if this event is detected. Ideal for “before you go” marketing messages.
If Mobile
If Mobile is a condition that only fires your trigger if the user is viewing your website on a mobile device. When condition is active, users on desktop devices will not see your trigger.
Simply activate the toggle switch on the left side of the condition you want to use, and your trigger condition has been met. Timer Length and Scroll Depth conditions also require a select option from a predefined list. Scroll-To and On Click conditions require an element ID (a CSS ID) to fire.
Once you’ve selected your condition, click the black “Add Trigger” button to publish your trigger to your website.